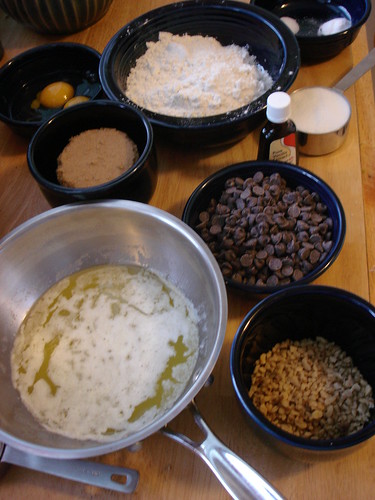
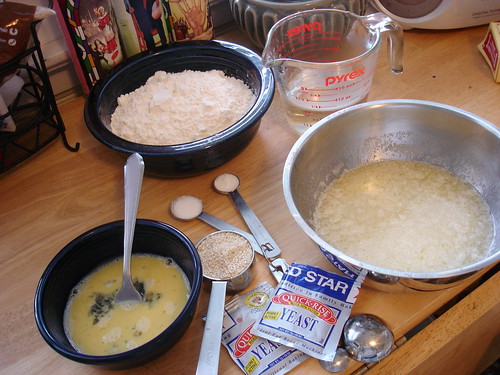
Showing posts with label cooking. Show all posts

Sunday, January 6, 2008

Bread!

Or rather, sumsum! The author of the cookbook I used says that these were popular with Syrian Jews in Paris -- they'd have some with their coffee during the Sabbath. Let's explore Sabbath snacks through the eyes of Syrian Jews in Paris!

Ingredients:


2 packages of dry yeast (make sure they are not expired)
1/2 teaspoon of granulated sugar
1 cup warm water (anything that feels hot will kill the yeast)
1 teaspoon salt
3 cups all-purpose, unbleached flour
8 ounces (2 sticks) of melted butter
1 beaten egg, to brush
1/4 sesame seeds, to sprinkle


You will note in the background that my santos were present, like when I made pernil, to ensure a successful baking session. Fantastic! So, in a mixing bowl, stir together yeast, warm water, and sugar. Allow the yeast to dissolve and become frothy, about 8 minutes.


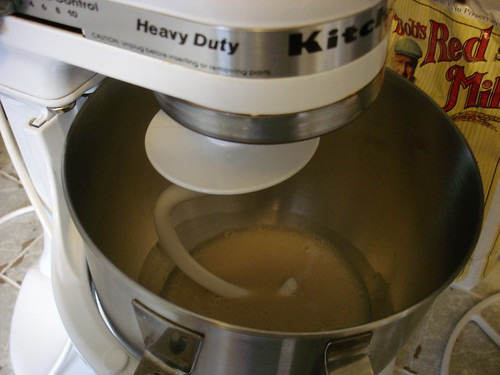
Then I added 1 cup of the flour and the salt. Blended again, then added the melted butter (it should not be hot, let it cool off a bit). If by hand, beat 40-50 strokes. If with mixer, roughly the same amount of strokes. Basically, you want them well-blended. I added the rest of the flour, 1/2 cup at a time so as to bring the dough around easily and gently. Dump it in all at once and you may end up with a cannonball.

Once a dough starts to form, you're no longer mixing the ingredients, but kneading them. I kneaded it on a low speed for about 5 minutes. Over-kneading, various bread-makers warn, can make the dough tough and not very tasty. I desperately do not want tough and untasty dough, no sir!

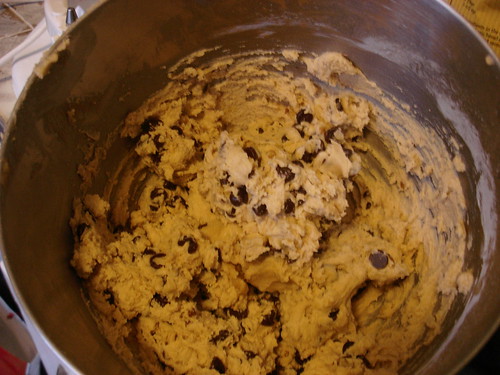
I apologize for this picture, as I admit it is not very appetizing-looking. But I wanted to show what the author means when he says the dough should be soft and elastic, not sticky at all:


It's no longer sticking to the sides of the bowl. The folds show you that it's soft, and as I pull a portion of it up, it's pliable. So, we've got dough.

Now we put it in a bowl to rise.


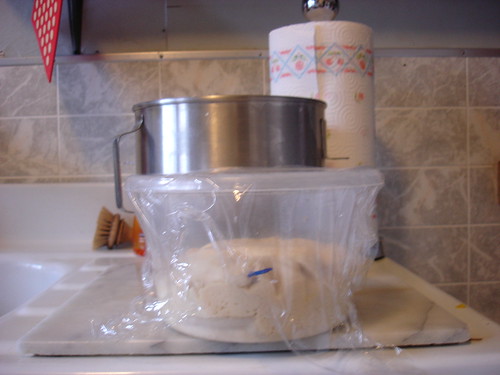
It needs to rise to double the amount of the original size of the dough. I marked it with a marker, because I was using one of those disposable containers and don't care if it gets marked up. If I'd had a rubber band, I would have just wrapped it around the bowl to mark the starting point, that way I would know when it doubled in size.

Some observations: a tall-sided bowl, I think, gives you a good idea of the rise. I also liked using a clear vessel, for ease of observation. You are supposed to let it sit and rise in a room that's about 75 degrees, which is normally considered room temperature. It's winter here, and I'm a miser who doesn't turn up her thermostat past 69. In case you are in a cold environment, boil 2 cups of water in the microwave. Once it boils, stick the container in there and leave the water in there too. That should help create a warmer temperature. Too warm a temperature, and it will rise very quickly, so those of you in PR, take note of that.

This actually happened to me. The recipe said it would take about 2 hours to rise, but in after the microwave trick it only took 1. Moral of the story - rising times are approximate, the conditions in your kitchen will ultimately affect how long it takes. So, keep an eye on it.

With the dough risen (sorry, forgot to take a picture of that!), it's time to start shaping the dough.

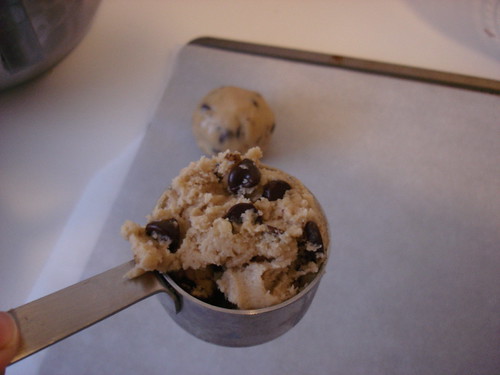
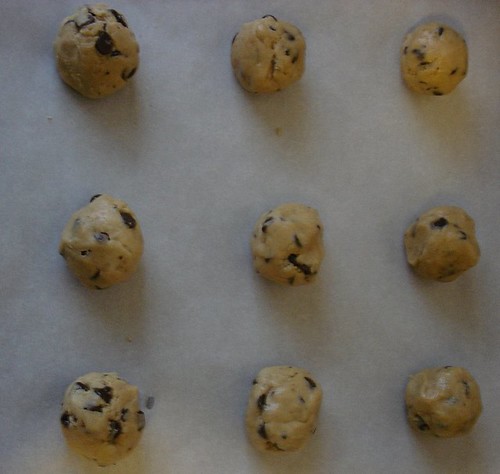
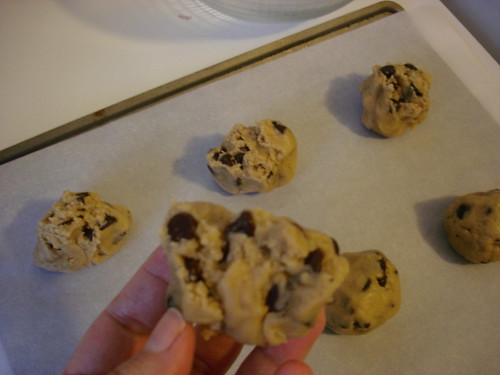
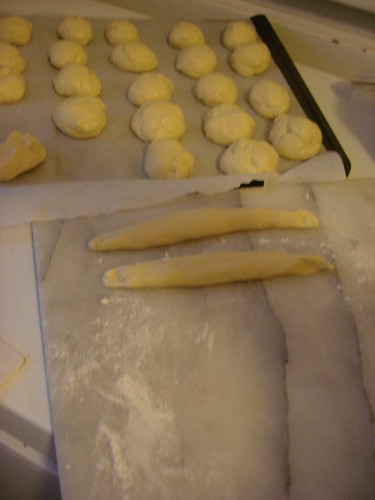
The recipe says it should yield 24 sumsums, so I shaped the pieces of dough according to that figure. I placed them on a cookie sheet covered in parchment paper to prevent the bottoms from burning. Then I rolled them out into into balls. Really go to town on this, as my 9th grade English teacher Mrs. Riefkohl used to say when she urged us to "go to town on your essays": cup them in your hands and vigorously ball them up (stop snickering) -- this helped keep them in shape. Flour your hands with each one so they don't get damp and slippery. If they are dry they will hold their shape better.


Now we roll them up so they are approximately six inches long. Again, flour up your hands and the work surface when you do this. I started them out between both my hands to form the basic shape, then finished the job by rolling it between my palm and the work surface to get the length:


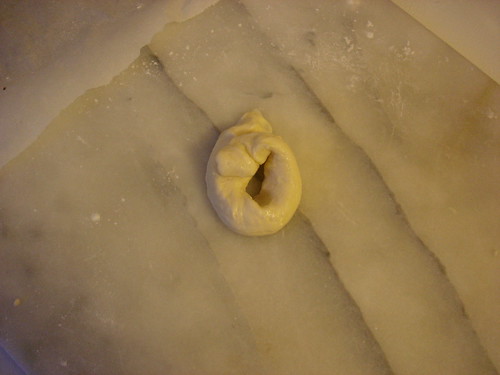
Woot! Now, to roll them up. You curl them around your index finger, and you let the ends overlap each other. Kind of looks like a tortellini, doesn't it?


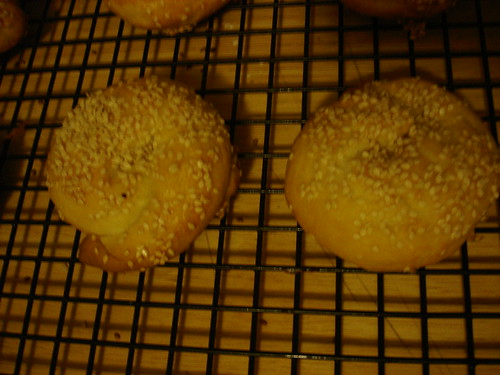
Now is when you start to preheat your oven to 375 degrees, as they will need some time to rest. Once it reaches temperature, brush them with the beaten egg and sprinkle on the sesame seeds, as much or as little as you'd like. Arrange them about an inch and a half apart on the sheet. In the oven they go.

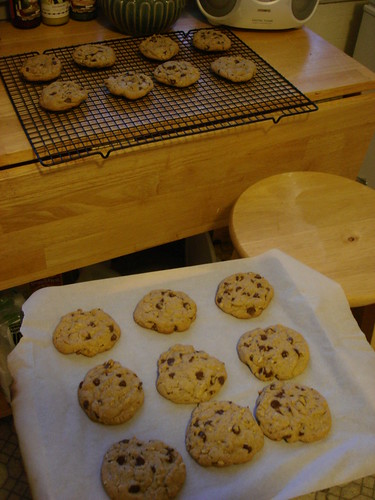
The recipe, curiously, doesn't say how long to bake them for -- only to bake them till they are golden yellow. I made two batches, and discovered that by the time they turn very golden yellow, they are too crispy. Pale golden yellow is the way to go, as it yields a slightly crunchy crust with a soft, buttery interior. Did I say buttery? I meant BUTTERY. You can see the layer of butter inside the bun. If you like butter - and to me, butter is only rivaled by bacon when it comes to its taste sensation - you will love this. I can see why it is served simply with tea or coffee, as it doesn't really need much adornment. I would recommend setting your timer to 20 minutes, checking it, and increasing the cook time by 5 minutes incrementally. My magic number was 25 minutes.


If there are any Syrian Jews in Portland looking for a Sabbath snack, I can totally hook you up.

Recipe from The Breads of France: And How to Bake Them in Your Own Kitchen, by Bernard Clayton, Jr.

Cookies!

To some of you, making cookies from scratch may not be a big deal. Why is she even posting about this, you might say? Because I'm new at this and I'm excited about it, damnit. If I become a world-famous baker, you will be able to see my very first attempt and say "Look, I knew her back when making cookies was amazing to her." So, you're welcome.

Let's get started! Here are my ingredients:

2 cups plus 2 tablespoons unbleached all-purpose flour
1/2 teaspoon baking soda
1/2 teaspoon salt
12 tablespoons (1 1/2 sticks) unsalted butter, melted and cooled until just warm
1 cup packed light brown sugar
1/2 cup granulated sugar
1 large egg, plus one large egg yolk
2 teaspoons vanilla extract
1 1/2 cups semi-sweet chocolate chips
1 2.25 oz bag of finely-chopped walnuts (optional)

Okay! So I preheated my oven to 325 degrees. In a bowl I tossed together the flour, baking soda, and salt. In my mixer, I mixed on low speed the butter and sugars until blended. Then I added the egg, yolk, and vanilla and beat that until blended. At last, the flour mixture. The result? Cookie batter!


Oh, cookie batter, you are such a temptress. I refrain from eating you not because of the raw eggs, but only because doing so may fill me up and ruin me for the final poduct. If you don't have a mixer, then mix by hand until the consistency resembles the picture above.
Next, I lined a cookie sheet with parchment paper and got to work making the cookies. Using a 1/4 cup measuring cup (barely filled) in order to ensure that they were all the same size, I rolled up the batter into little balls. What? You can't picture it? Well, here:


But we are not done! To give them a nice chunky appearance on top, I tore each ball in half, and then put them together so that the jagged sides faced up. Look, like this:


Into the oven for about 15-16 minutes, no more than 18. This batch yielded 18 cookies. After they are done, I placed them on a baking rack to cool.


Beautiful, tasty cookies. ¡Fácil!

Cooking, baking, and a time without the internet

These past few winter weeks in Portland have been the same one after another: gray and rainy. It hasn't stopped, and won't stop for the foreseeable future. A break in the monotony came on Christmas Day, when it snowed. Aww! Where's Bing Crosby when you need him? But it was barely cold enough for snow, so it didn't stick.

For the past few days I've been thinking that I might want to try my hand at baking. I think I might be suited to its methodical nature. Also, I got a KitchenAid mixer for Christmas. I've never been a baker -- the closest I have come is making cookies from Pillsbury pre-made cookie batter with my grandma. We'd bake them in the toaster oven and, man, those things were like heaven to me.

But even more than baking cookies, I want to make my own bread. I've been wanting to for a long time, and I think I have narrowed down the two main reasons. For one, I adore bread. Any kind of bread, I will eat it. I don't even need butter or jam or anything on it -- if it's good bread, I like it on its own. If I'm hungry and cranky, but I know I won't be eating properly for a while, a slice or two of bread will immediately calm me down. But also, I am very attracted to the process of making bread. I'm fascinated by the idea that people all over the world have been making it, in pretty much the same fashion, for thousands of years. I like the thought of being part of that tradition, of creating food that has been around for a long time and has sustained entire populations. It may be the reason why I also love it when Dave and I make a dish called antico peposo. You braise beef in red wine and crushed peppercorns for about four hours. In the end, the beef comes out almost black, and winey and peppery. It has the feel of something that people may have made long ago, in order to use up less-than-desireable cuts of meat and dress them up a bit. And indeed, the recipe has been traced back to at least the 5th century. As a history buff (especially of antiquity and the dark to middle ages), the idea of eating foods that have sustained people back into times that seem so far away as to almost be inconceivable really calls out to me.

Anyway! I woke up on a rainy Saturday morning, and decided that on that fateful day, I would break in that mixer. I would make chocolate chip cookies, my favorite, and bread. I looked through my cookbooks and found two recipes: Thick and Chewy Chocolate Chip cookies from The New Best Recipe, which is a cookbook published by the magazine Cook's Illustrated, and Ka'Achei Sumsum, which are bagel-like buttery breads that, according to The Breads of France: And How to Bake Them in Your Own Kitchen by Bernard Clayton, Jr., are popular with Syrian Jews during Sabbath. Syrian Jews? Sabbath? That sounds old. Sign me up!

A word about The Breads of France: I linked to the 2002 edition, but I have the 1978 edition. It was a hand-me-down from my mother-in-law, an experienced baker. Having read over 30 year old-plus cookbooks before, I was concerned that it might be hard to translate the recipes into something I could make today as a beginner. Not so. His instructions are clear and step-by-step; having no clue what the finished dough should feel like, his descriptions alone guided me pretty much perfectly. What did make me laugh were the repeated references to hard-to-find ingredients or tools, and the inclusion of addresses to write to the manufacturers for a list of retailers. No internets! In fact, many of those items are now easily found today. See what I say about olden times? They're fascinating.

Things like these are what I love about old cookbooks: you can see how times have changed, not just in how easily some ingredients can now be found, but in the level of knowledge about world cuisines that is present then versus today. For example, Clayton mentions that to many Americans, the catalogue of French breads is comprised of mainly a baguette. And in an old Trader Vic's Mexican cookbook, Vic himself writes:

I ate Mexican food [in Mexico] until it almost gave me an ulcer. In Mexico it was pretty greasy. The finest Mexican food I have enjoyed came from what is known as Texas-Mex. Now, I know I'm, going to make a lot of Americans sore as hell -- you have to understand that I am an American, not a Mexican, and I eat what pleases me most. So, my wife and I went to work flying all over Mexico, eating their stuff, and then making adjustments on it so it would be palatable to Americans.

Mexican food is "stuff"! Har! He goes on to give Mexico credit for one thing: its arts and crafts. He and his wife became avid buyers, and he calls them "absolutely the most". Oh, Vic! That's better than "groovy", isn't it? Are they also the bee's knees?

I haven't tried any recipe in this book. Personally, I stick to his tropics-inspired cocktails -- his recipe for piña colada from his Bartender's Guide produces, bar-none, the best one I have ever had. But the book has brought me countless moments of joy as I read through it, and found such gems. The thing about Trader Vic and his numerous world-cuisine cookbooks is that, even though the recipes were beaten into American-palate-of-the-70's submission, they did bring all kinds of crazy ethnic cuisines to American home cooks' food conciousness. You have to start somewhere, and I guess it was all about baby steps at first.

So, in honor of this momentous occasion, where I would be making bread, the staff of life, and cookies, what might as well be the staff of life for sugar addicts like myself, I decided to document this first attempt at baking for posterity. Soon I will post pictures of those attempts.

(By the way, if the antico peposo sounds interesting to you, which it should, since it's easy to make and delicious, check out this book by Lidia Bastianich. The woman is an Italian cuisine master, and she has a great show on PBS. Also, stop watching the Food Network and start watching the PBS cooking shows, if they are available where you are. New Scandinavian Cooking, Fast Food My Way with Jacques Pépin, Lidia's Italy, Daisy Cooks with Daisy Martinez...wonderful shows. But I do give you permission to watch Good Eats with Alton Brown on the Food Network and, if you are in the mood for a laugh, Semi-Homemade with Sandra Lee, the woman responsible for this monstruosity.)

Monday, October 15, 2007

Nothing like the smell of pork to wake you up in the morning

So this past weekend was pernil weekend.

Prep started on Friday, when Dave came home with this hunka burnin' love:

20 lbs of bone-in, skin-on pork shoulder. He had to place a special order at Gartners Meats, a fantastic butcher shop here in Portland. They, in turn, got it from Carlton Farms, purveyor of healthy, rosy pigs to good restaurants all over Oregon. Our particular cut was gorgeous -- this pig led a good life. I ensured a good cooking session for Piggy here by surrounding him with the saints you see in the votive candles.

With the pig finally obtained, we turned to the seasoning. Pork shoulder can be a fairly bland-tasting cut on its own, so it needs some help. When it's 20 lbs, it needs some serious help.

We decided to use a two-pronged approach: stuff it with sofrito (left), and cover it with adobo (right). I have to confess that the sofrito looks less than stellar because I had made it previously, frozen it for later use, and re-heated it. It tasted good; not great, as with fresh sofrito, but I'll be damned if I'll make fresh sofrito every time I need some. (Recipes at the end of this post).


We started by stabbing holes into Piggy with a steak knife. These holes don't need to go all the way down to the bone, but should be a couple of inches deep. Into these holes you'll be stuffing your seasoning. I just used both ends of a spoon: the spoon itself to start puring the sofrito in, and the handle to gently tamp it down to make room for more. Eventually, you'll start to see it spill out from the hold, and that's when I stuck a slice of garlic in there. You are supposed to stuff it in there until you can't see it, but I left mine peeking out of the holes, so that I could keep track of which ones were filled already. As for the seasoning, sofrito was nice, but I think I'd like to use adobo next time because the flavor is more intense. The bottle of Tecate in the background is not part of the recipe, it's just there for the chef's enjoyment. The cell phone is there for the chef to call her mother and her friend, Elsie, back in PR, for last-minute questions. They've done this before, I haven't.

After stabbing and filling all sides:


our pig is ready to have his garlic secured and be massaged with adobo:


At this point, I placed Piggy in a roasting pan, covered it in plastic wrap, and refrigerated overnight. This bad boy needs time to marinate.

At 5:30 the next morning, we placed it in a 250 degree oven, tented it with foil, and stuck a thermometer in it. (Note: we put Piggy on a roasting rack, and in a roasting pan. For the love of God, don't forget to line the roasting pan with foil, like I did. Unless you like cleaning up a lot of fat, then by all means, forget.) The aim was to cook it low and slow, especially during the hours of 5:30 and 8:15 am, during which both chefs had gone back to bed and did not wish to run the risk of leaving a hotter oven unattended. The temperature was brought up, over time, to 350, then 370, and this cooking process went on for about 9 hours. The smell that permeated the house was unbelievable. Our landlord was outside doing yardwork, and he said he was drooling from the smell. Drooling in a good way.

Nine hours is a crazy-long time, but there's a reason. Bone-in pork shoulder is very fatty. That fat has to render, or else you'll be left with a thick slab of blubber and dry meat. To render this fat and have it permeate the meat and leave it soft, moist, succulent, and a host of other words that I find gross but are really what you're looking for in the end result, the cooking should be done at medium temperatures for a long time.

Once out friend reaches 140 degrees, we can untent it. Also, we can quickly remove it from the oven and pour out the juices, as these will make the inside of the oven humid and prevent the skin from crisping up. I'm told you can make gravy out of the brown bits and juices, but to be honest the juices were very very fatty, and I just couldn't see myself successfully making gravy out of it. If you're thinking you might want to give it a shot, then lining the pan in foil is not a good idea. But really, I'm telling you, it is.

At 180 degrees Piggy is done cooking, and we're ready to make some cracklin' out of that skin. I mean, that's the reason we got it skin-on, so we could make some awesome chicharrón, or pork rind, out of it. We blasted it up to 425 degrees for, say 10 minutes. The skin ends up rock-hard to the touch, but once you let the pernil rest you will see that the skin peels off easily. The adobo will have browned and hardened up in clumps, there will be a thin layer of flavorful fat underneath, and I promise you, you'll never have so easily looked heart disease in the eye and said, "Bring it on. Nothing matters now".

I'd like to say that I have a picture of the end result, before it was carved up and eaten. See, what happened was that we were in a hurry to leave, so we packed Piggy up and took it to a potluck. I figured I'd take a picture once we arrived. Well, we arrived, set Piggy down, and went to say hi to our friends. I then grabbed my camera and sauntered back to the table to find this:


You can get a bit of an idea of what the skin looks like from looking at the bone sticking out on the left. Dark, and looking like tanned hide. The picture is blurry because people were waiting to continue picking at Piggy and I had to be fast. You can see the slices of garlic that I stuck in there, and also the sofrito.

This thing was other-worldly. Everybody at the party went crazy over the pernil. I was a bit concerned, thinking that the fatty meat and fatty skin might turn some people off in its primitive, caveman appearance -- especially since Portlanders have a reputation for healthy living. But these people got in touch with their inner primeval hunter and chowed down. The meat was tender enough that slicing wasn't necessary, you could just pull it off with a fork. And if you were lucky, you'd geta piece that was speared with the sofrito and garlic. The combination of the soft-but-present seasoning in the meat was wonderfully countered with the intense saltiness and crunch of the skin. We received many compliments on Piggy. And we learned that while pernil is certainly something that takes time and effort, it's not difficult, and the results it yields are absolutely worth it. Especially that skin and meat mix -- that combo will make you wonder why anyone would want to be vegetarian. Not that there's anything wrong with that, it's just that I couldn't do it. I would think of Piggy, and weep.


Adobo
Dave came up with the adobo recipe, which is why the measurements are precise.

36 cloves (half mashed up into a paste for the adobo in a mortar and pestle, the other half sliced to stick into the holes)
6 tbsp salt
6 tsp olive oil
6 tbsp vinegar (white or red wine will work)
3 tbsp ground pepper
4 tbsb oregano

Sofrito
I came up with the sofrito recipe, which is why the measurements are not precise.

2 bunches of cilantro
1 bunch of parsley
3 garlic cloves (or so)
1 red pepper
1 medium onion (or thereabouts)

This gets blended in a food processor until it becomes a paste, or as close as this will get to a paste. This recipe is for a big batch -- I then freeze it in ice cube trays to make it easier to use the sofrito once it's been frozen. For Piggy, I went through about 9 ice cubes of sofrito. I never add salt to my sofrito because I like to control the amount of salt I use right when I am cooking. For the sofrito I added to Piggy, I actually added a lot of salt. That's as close a measurement as I have, but for this application I would say add as much as you are comfortable with, then add more.

Sofrito's ingredients are usually a bit more interesting that this one's, but they are not easily found around here which is why I substitute. For example, usually instead of cilantro, which is the base, culantro is used. Culantro is a flat-leafed relative of cilantro and has a headier cilantro taste but with less of an edge. Its flavor profile is too strong to be eaten raw, like cilantro can be, so it is used mainly for cooking. Red and green peppers can be used, but a better flavor comes from ají dulce, or sweet peppers. I've never seen those here either. I guess it's time to start my own little garden.